Excavating Burials
- By: Gregory Crees |
- May 12, 2008
- Share
- del.icio.us

Last week, I helped with the excavation of a Roman cremation urn Context: 780. Nancy and Liz came over from the Museum of London to show me how to remove the urn. Having looked unsuccessfully for the ‘cut’ of the feature, it was decided to excavate some of the soil from the top of what was exposed of the urn, firstly to assess its size, and whether it would taper down in a ‘vase’-like fashion or if it would bulge outwards (as Roman urns come in many shapes and sizes).

Liz, Nancy and Greg lifting the first cremation urn.
After it was determined that it was of the first type, we were free to dig deeper to expose more of the urn. Though most of the lid had caved-in, there was still a piece remaining on one side. We were careful to leave some extra soil around this area in order to keep the lid exactly in place. In fact, as we dug down, we left one or two inches of soil surrounding the vessel and wrapped bandages round as we went which we secured in place using safety pins – to provide support in case the urn was cracked or if there were any hidden fractures which you would be unable to see until all of a sudden the urn could turn an urn into a pile of urn! In addition we wrapped another type of bandage (commonly used for broken arms or legs) which goes hard when dampened (or if simply exposed to air over a longer period of time). We dipped it in water before wrapping round the urn and it set in about 15 minutes.
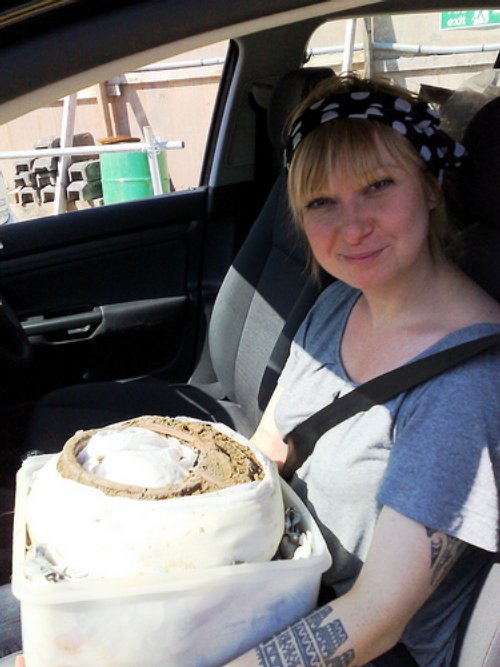
Lorna holding cremation urn (760) ready for delivery for further analysis and safe keeping at the Museum of London
A colour change in the soil to a lighter orange indicated we’d reached the lowest point of the cut and we gingerly ‘rocked’ the urn to test that it would now be ready to lift. In this case it was, so we were able to carefully place the urn onto a strong metal pad in order to facilitate a safe lifting (we’d dug a larger hole to one side or the urn to accommodate this). As it goes, having removed the urn nicely bandaged up I can actually tell you little about it because I didn’t really see it! Oh well, I’m sure the Museum will do a good job and it will be one for later… Lorna took it off to the Museum of London, where it will be x-rayed and excavated by the conservators.
The day after digging the urn, I set my sights on to a rectangular-shaped cut adjacent to where the urn was which proved to be – as suspected – a Roman grave Context: 741. It was buried roughly on a N-S axis and there were a number of associated vessels with it, as well as some nails (suggesting a coffin?) and an unidentified metal object. It’s N-S alignment and the fact that objects had been buried with it might suggest it was a non-Christian burial and therefore of early Roman date.
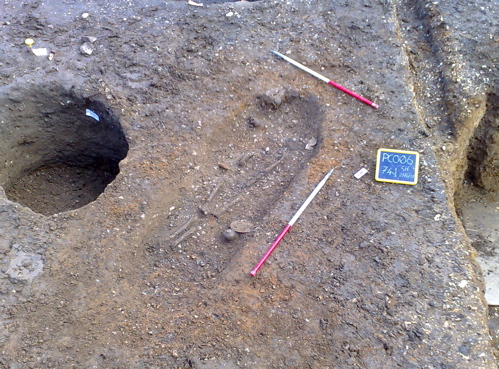
Burial 741, a complete adult inhumation with gravegoods. It is aligned N-S on the main cemetery alignment.
Unfortunately the soil had not been kind to the bones, and only the long-bones of the legs and arms survived, as well as a couple of teeth (teeth are the best-surviving type of bone). Initially I thought there may have been some staining-impressions of the decayed-away bones but this proved to be just variations in the fill. One thing I must mention is that when it came to removing the vessels it did seem a bit weird like it wasn’t really mine to take. I didn’t think of that when I removed the urn, but maybe this was because there was no obvious body or ‘person’ associated with it (or at least, not one that I could see since it was inside).
Overall it was an exciting couple of days and reminded me of why I do my job! (Aside from the money and the fame etc. etc.). If you want to find out more then I suggest you tune into the video blog where you will see some film of the excavation of these things.